Layouts by Millie

I CT For


blog train

Showing posts with label Religous. Show all posts
Showing posts with label Religous. Show all posts
Tuesday, September 3, 2013
Under the Sea

This tutorial was written by Me.
On 8/29/13.
Please don't copy it or claim it as your own or post it through any group.
You may link back to my blog.
Any resemblance to any other tutorial is strictly coincidental.
It is written assuming you have a basic knowledge of psp and its tools.
It is written using psp X5 but should work in any other version.
You will need the Pay to use kit Under the sea, by
The font I used is Sweetie Hand
and my Word art
Be sure to click on it so you get the full size
then right click and save.

Paste Waves #1 as a new image. Duplicate it twice and stack them on top of each other.
Make sure that you dont leave a gap between any of them
Add the sea creatures and plants to the tag.
Re-sizing them as desired. Move them between the wave layers.
You will need to make them different sizes and mabey rotate a few with different settings of course.
Make sure to leave some on top of all the waves.
Add a shadow to each after you have re-sized and sharpened each animal.
When yuour happy with it add splash #1. Duplicate it a couple of times and position them as desired.
When your happy with the tag so far. Add the Dolphin, Rotate him so he looks like hes jumping out of the water.
Add splash #2 around him.
Add my word art.
I have made it so you can use your freehand selection tool to copy one part at a time.
So you can arrange the whole verse together or in different parts of the tag.
Or use your own text or word art.
Add a tube if your using one and be sure to give credit to the artist as well as your taggers information.
When your happy with your tag, select all, float and defloat.
Then go to image and crop to selection.
Now add your name and your favorite text effects.
And your done!
Thanks for trying my tutorial!
I hope your happy with your results. I would love to see them!
Hugs from Kel

Thursday, August 1, 2013
Inspirational word are freebie

Hi!
I have created some Inspirationl word art.
Personal use only.
Please do not share or change the file names.
Please just link back to my blog.
Hugs and may God Bless you!
download
download
Kelli
Wednesday, July 31, 2013
Ascension
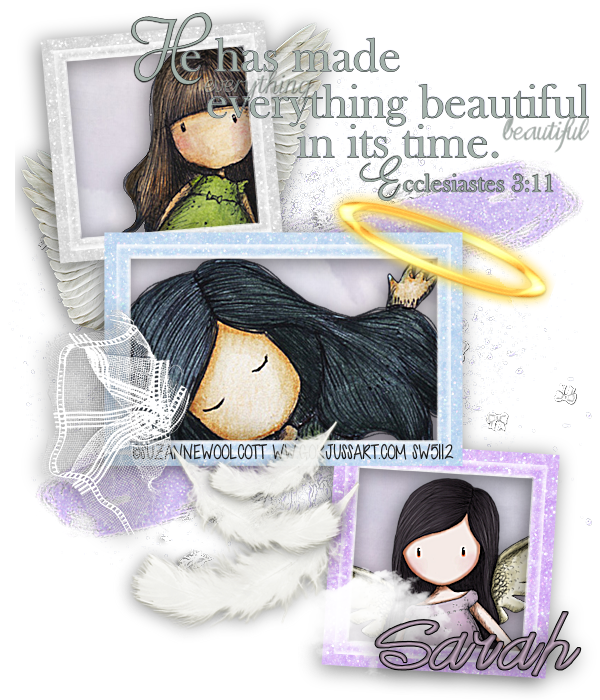
This tutorial was written by Me.
On 7/31/13.
Please don't copy it or claim it as your own or post it through any group.
You may link back to my blog.
Any resemblance to any other tutorial is strictly coincidental.
It is written assuming you have a basic knowledge of psp and its tools.
It is written using psp X5 but should work in any other version.
You will need the Pay to use kit, Ascension, designed by Designs by Sarah.
You can purchase it here,
You can check out her blog Here.
You will need a tube of choice.
Im using Suzanne Woolcott.
You have to have a license to use her tubes or images.
Purchase her tubes here
The font I used is Good Day
I used this word art,
I cant remember where I got this word art.
If you can tell me, please do so I can
give credit where credit is due

Ok Ready?
1. Open a new image, 600 by 700, Flood fill any color, to make it easier to see what your doing.
Some of the elements are very light in color, so I recommend a dark color.
2. Add smear #1, Re-size it by 85%, rotate it left by 20%.
Duplicate it once. On one of these layers, mirror and flip it.
Move the mirrored one to the bottom corner, and the other one goes to the top
in the opposite corner.
3. Add one of the scatters, I used scatter #1. Sharpen it.
4.Add frame #4,
Sharpen.
5 . Grab your magic wand and click inside each of the 3 frames.
Expand the selection by 4.
6. Paste a paper of choice as a new layer.
Invert selection and hit delete on your keyboard.
7. Now add your tubes of choice.
You could also do images, just omit the above step.
Be sure to use tubes or images by the same artist.
8. When you have them positioned as desired, merge the three layers and hit delete on your keyboard again.
Sharpen more, and if you used tubes, add a shadow of choice.
9. Drag the paper layer and the tubes layer below the frame layer.
Add a shadow to the frame layer and merge the 3 layers.
10.Position the elements you have already added to your image.
11. Now add the Halo re-sized to 35%, below the frame layer.
Use your freehand selection tool and select the front part of the Halo ,
You may have to re-do it several times, make sure you only select the front of the halo.
Once happy with the selection, promote selection to layer, drag the promoted selection above the frame layer,
It should look like the halo is hanging on your frame.
If you got some of the back of the halo or didnt get all of the front selected,
undo and try again. When your happy
select none.
12. Add one of the feathers as the top layer, I used feather # 3.
Re-size it by 65%, Add a shadow and position it at the bottom.
Duplicate it, Re-size the duplicate by 75%, mirror.
Repeat the above step once more, so you have 3 feathers that look like they are falling.
13. Add one of the clouds, I used #1. Re-size it by 75% twice.
13. Add one of the clouds, I used #1. Re-size it by 75% twice.
Duplicate it and position them side by side.
One overlapping or however you would like it.
Move it over and above the bottom frame.
Position it and then drag the feathers on top of it.
I re-sized the feather layer again by 85%.
14. Add the lace from the kit, re-sized by 45%. Mirror it and add a shadow.
Position it on one of the frames.
15. Open the wings #1, Use your freehand selection tool, to
select one of the wings and promote selection to layer,
on the original layer, hit delete. select none. Now the wings should be on different layers.
Copy and paste one of them as a new layer, Re-size it by 45%. Sharpen it and add a drop shadow,
Drag it under the frame layer on the appropriate side of the frame.
Repeat with the other wing.
16. Add more elements if desired.
17. Add your word art or type a sentament of choice.
18. Add your name, Mine is size 72.
Add an inner bevel and a drop shadow.
Delete the colored layer.
Delete the colored layer.
19. Save as a png,
And your done!
And your done!
Thanks for trying my tutorial!
I hope you are happy with your results!
Subscribe to:
Posts
(Atom)
My Blinkie
